The pain of manual documentation
Documentation in software development is not the highest source of happiness for many teams. It’s in their nature that they would rather deal with code than be stuck with administrative and organizational tasks.
Nevertheless, the documentation of a software product must, of course, be as complete and comprehensive as possible - on the one hand, to create transparency and visibility for stakeholders internally, and on the other hand, to keep customers and users up to date and to provide them with important details on further development and new functions.
In short - documentation should be synchronized as much as possible.
Automatic documentation of Jira content in Confluence
The AutoPage app has set out to take away teams’ pain regarding manual documentation work. Namely, it makes it possible to automatically create Confluence pages directly from Jira, documenting the current content of tasks. This way, development organized in Jira can be kept in sync with documentation in Confluence.
Sounds promising? Then give AutoPage a try! This article supports you because, in it, we will go through the initial setup of the app step by step. Once you've done this, your team can use Jira as usual - the only difference now is that automation is mapped in Confluence.
So here goes. We'll start at the very beginning with the installation of AutoPage.
The setup: two apps and the connection wizard
First, you install two apps in your Atlassian systems. That's right, because on the one hand, you need the actual AutoPage app in Jira, and on the other hand, you have to build a bridge to Confluence. The little helper responsible for this is called AutoPage - Helper App for Confluence, which is free of charge. So you have to install it additionally in your Confluence instance.
After that, connecting the two apps to your systems is necessary. The corresponding process is provided directly: When you start AutoPage for the first time (either from the left panel in a project or as admin via the Manage Apps area), the Connection Configuration Wizard becomes active and guides you through the linking process. This sets the technical requirements for communication between Jira and Confluence.
The prerequisites: a Confluence template and a Jira automation rule
Then, it's time for the first configuration. Through it, you ensure that your team can later work normally with their Jira operations while issues and their contents are documented in the background.
This preparation is quite simple because it only takes two steps to start automating the documentation. First, you need a template in Confluence that serves as a template for the pages to be created. Second, you must configure an AutoPage automation rule in Jira that tells the app when to create Confluence pages from which operations.
A Confluence page as a blueprint
The initial Confluence template is a normal Confluence page that is to be understood as a blueprint for later documentation - and you are welcome to use the full capabilities of the Confluence editor to make the template page appealing and clear.
It gets exciting when you bring AutoPage's placeholder macros into play: You use them to determine where which content from Jira should appear. To insert a macro, simply type / followed by Autopage or use the + icon in the editor menu.

You can choose between inline and rich text macros. With inline macros, the Jira content is included "inline" exactly at the places where a corresponding macro is placed. Rich text macros, on the other hand, are suitable for text-heavy elements such as task descriptions; they are then output as actual text.
In the Autopage Confluence Template doc, you can read an overview of all currently available macros, including task type, task priority, completion date, and many more.
An AutoPage automation rule in Jira
After you have completed the Confluence template so far, you should turn to the Jira instance, because there, you now need to define one or more rules that will later trigger the automatic creation of a Confluence page. In the AutoPage app, you will see the Create rule button where a corresponding creation dialog will appear. An AutoPage rule consists of four elements: a trigger event as a trigger, the condition that must be met, the action that will be executed as a result, and some rule details.
Trigger
These triggers refer to events in operations. What action or actions should initiate the page creation? You specify it in this step, and you can combine several triggers. The following events can be used as triggers:
- Task created
- Task updated
- Task assigned
- Process mentioned
- Task commented
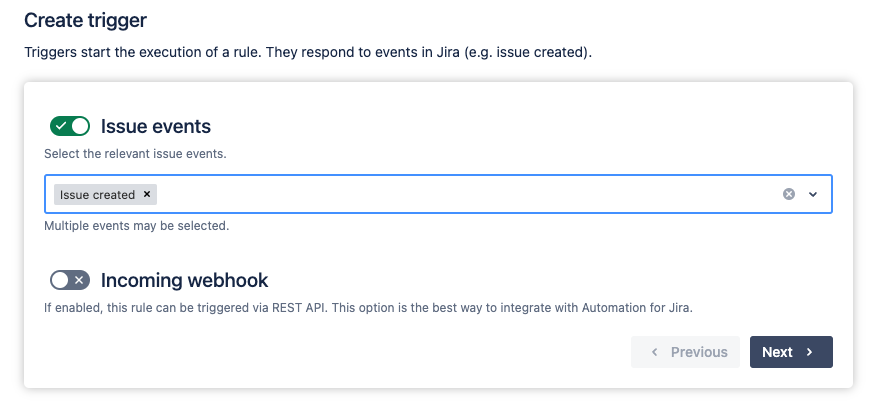
Technically savvy admins also have the option to define incoming webhooks as triggers via REST API.
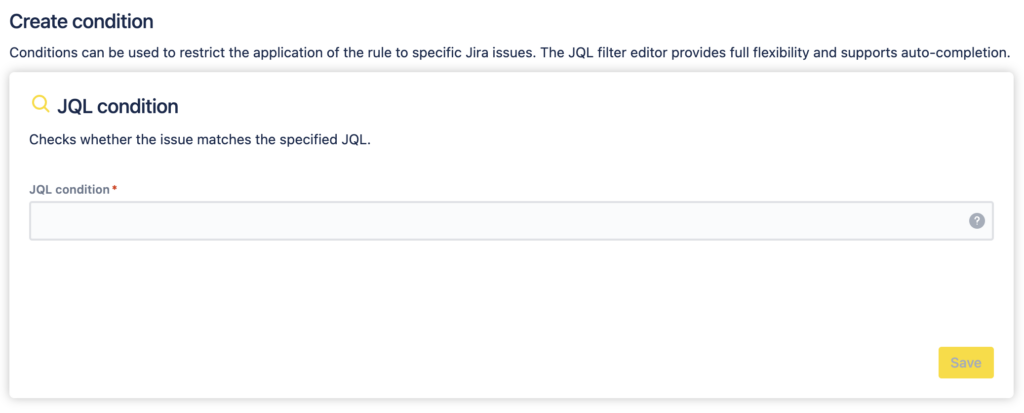
Condition
Since your team most likely doesn't want to automatically generate Confluence pages from all operations in the Jira system across the board, you need to define certain conditions afterwards, i.e. make restrictions. A condition is a filter that determines which tasks should trigger the rule based on certain criteria. To do this, you have to use JQL (Jira Query Language), which allows you to define very precise limits (see the official Atlassian documentation on how to use JQL).
For example, in a specific development project, do you only want tasks of a specific project and task type to automatically create Confluence pages, such as type "bug" tasks? With the JQL, you can accurately formulate this condition.
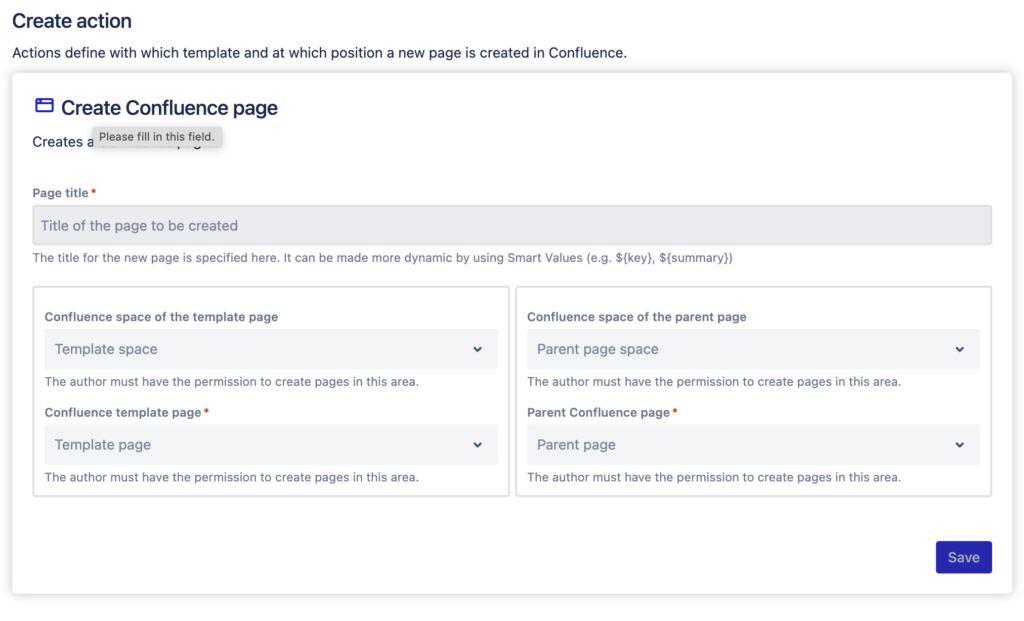
Action
Step 3 of the rule configuration revolves around the question of what should happen where when a trigger is fired in an operation defined by the condition. Specifically, what should the Confluence page that would be generated be called, what template should it be based on, and where should it be created?
For the page titles, you can use ordinary text or dynamic smart values, for example, to integrate task keys. Furthermore, you define the required Confluence settings here: You specify the area in which the template is located, as well as the template itself, and name the desired area and parent page in the page tree for the creation of the new pages.
Final details
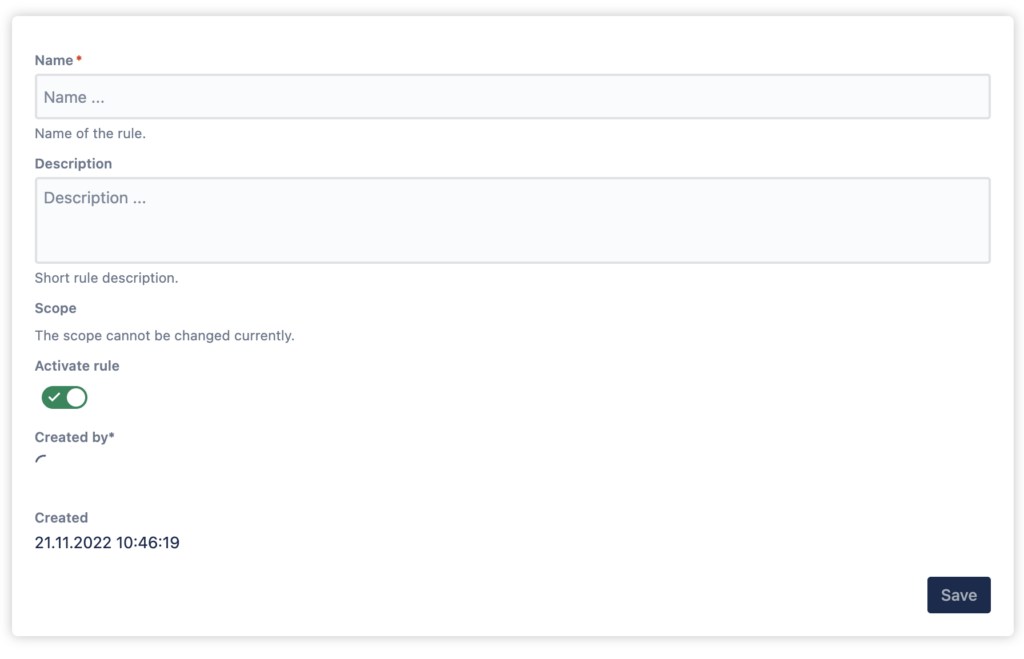
Finally, there are just a few small things left to sort out. The rule needs a name and preferably a short description that makes its purpose clear. In addition, you can enable or disable the rule. (Want more details? All info about the Autopage automation rules with their triggers, conditions and actions can be found in the app documentation).
And that's it - half an hour of administrative preparation is a manageable price to pay for the fact that from now on your team can automatically synchronize documentation and save significant amounts of time on manual work while simultaneously the stakeholders and users of your product always will have up-to-date information on the development.
AutoPage is available on the Atlassian Marketplace. You can put the app through its paces free of charge and without obligation! Do you have questions about the solution? Do you want to know more about the use cases or potentials? Then contact us or arrange a demo appointment directly: The development team looks forward to talking to you!
Further Reading
- Autopage Goes Cloud – the Easiest Solution for Your Documentation Problems
- Say Hello To FlowDingo – The Workflow App for Jira
- Automate Content Management Tasks with Automation for Confluence
- Spacecraft: The New Way to Theme your Public Confluence Spaces


