Have you ever created a Jira issue? If you find yourself in this blog, it’s likely that you have created at least one issue before, but have you ever created five? How about 10? How about 100? How was that experience? Does it ever feel repetitive? Does it ever seem boring? Do you often wonder why you are doing it and why there isn’t an easier way?
We’re sure that if you’ve created enough Jira issues, you’ve wondered about all of these things at some point in time. This is especially true if you are a team creating new features who follow a precise process for issue tracking. Maybe you are part of an experimental division in a large company and you own all new feature ideas and creation. Or perhaps you are part of a team that implements new features according to agreed upon stakeholder processes. Either way, consistency is key not only for the people performing the tasks but for all those involved. We want to look in the same place for each issue for the same types of information. Jira does this for us. Let’s quickly talk a bit more about Jira for those who aren’t familiar with the tool.
A bit more about Jira
Jira is the leading issue and project tracking software. It helps keep track of all your organization’s work while allowing them to work how they want. It keeps your team in sync and helps them move forward in their working process together. Jira works for teams of all sizes, from startups to Fortune 500 companies. The tool also fits for teams across all industries. If your team has some sort of work to do, they could create a Jira issue for it. That work item could then follow a unique workflow in Jira, which can be as complex or simple as you would like.
Structured Feature Development
Given this background and context about Jira, we can now begin to dive deep on the creating issues action within the tool. If your team uses the same approach to feature development when they start with a new feature, you might find yourself inputting the same tasks over and over again as you start to work on new features.
For example, if you wanted to build a new feature, you might create a task for research about the new feature to see if it’s feasible. You then might need another task for analysis of that research. The next step could be that you look to write out the specifications of that feature or at least parts of it. Finally, the development work will start for the new feature. The fun is not done yet though, you will need to test this feature. It’s likely you have some standard tests that you like to perform in order to validate that a new feature doesn’t affect other parts of the product. A lot of organizations do unit, system, integration, and acceptance testing.
With just this one new feature, we can see that there are at least five or six Jira issues that you will need to create in order to start working on it. Depending on your Jira setup, this could involve a tedious process of typing, clicking and organizing issues after you create them. Multiply this process out by ten, twenty, or even one hundred features and you can see a big time waste.
Templating.app
Templating.app 🚀 Jira Issue Template Automation | Templates, or Templating.app for short, allows teams to quickly create a group of Jira issues, without having to continuously click and enter new information. The app is available for all Jira cloud subscriptions and allows you to get started quickly after you install. You can use the issue templates for a number of use cases which you can read about in our blog.
For today’s purpose, let’s talk about how we can use Templating.app to help us automate our new feature development structure.
The first and most important step is to install Templating.app in your instance. If you are a site admin in your cloud instance, you can do this yourself. If not, you will need to contact the person with the necessary permissions.
After installing the app you will see an Issue Templates button in your “Apps” dropdown at the top of Jira.
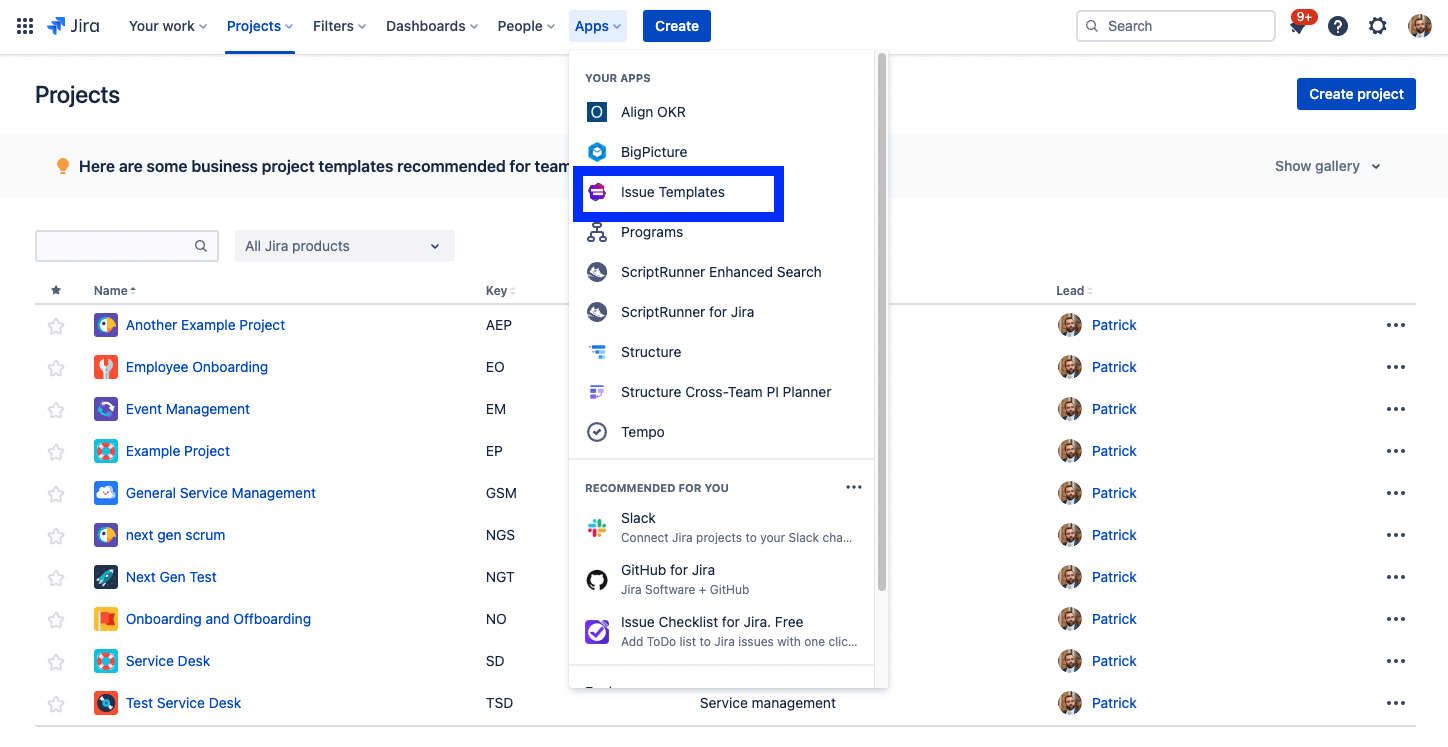
This is going to be your home for all your issue templates.
On this screen, you can see a list of all the templates that you have access to.
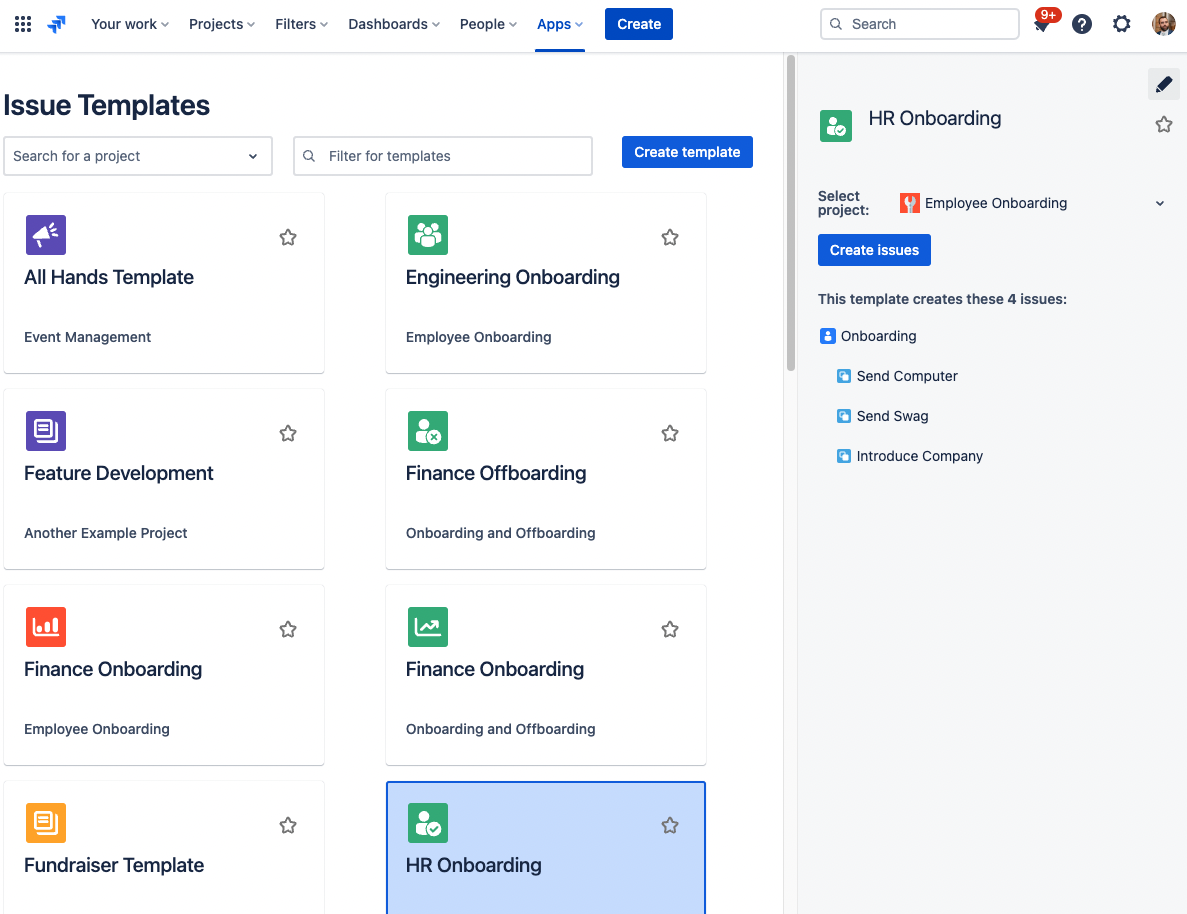
Permissions within the app are done at the project level and take the Jira project permissions. This means if you have access to view a Jira project, you will have access to the templates that are associated with that project. There is the option of toggling on “Visible in global library” option which allows all users to see the template.
If you select one template, as pictured above, you can see a quick layout of the issue template to decide if you want to use it or not. You can select “Create issues” if you want to create Jira issues using this template.
Create your own
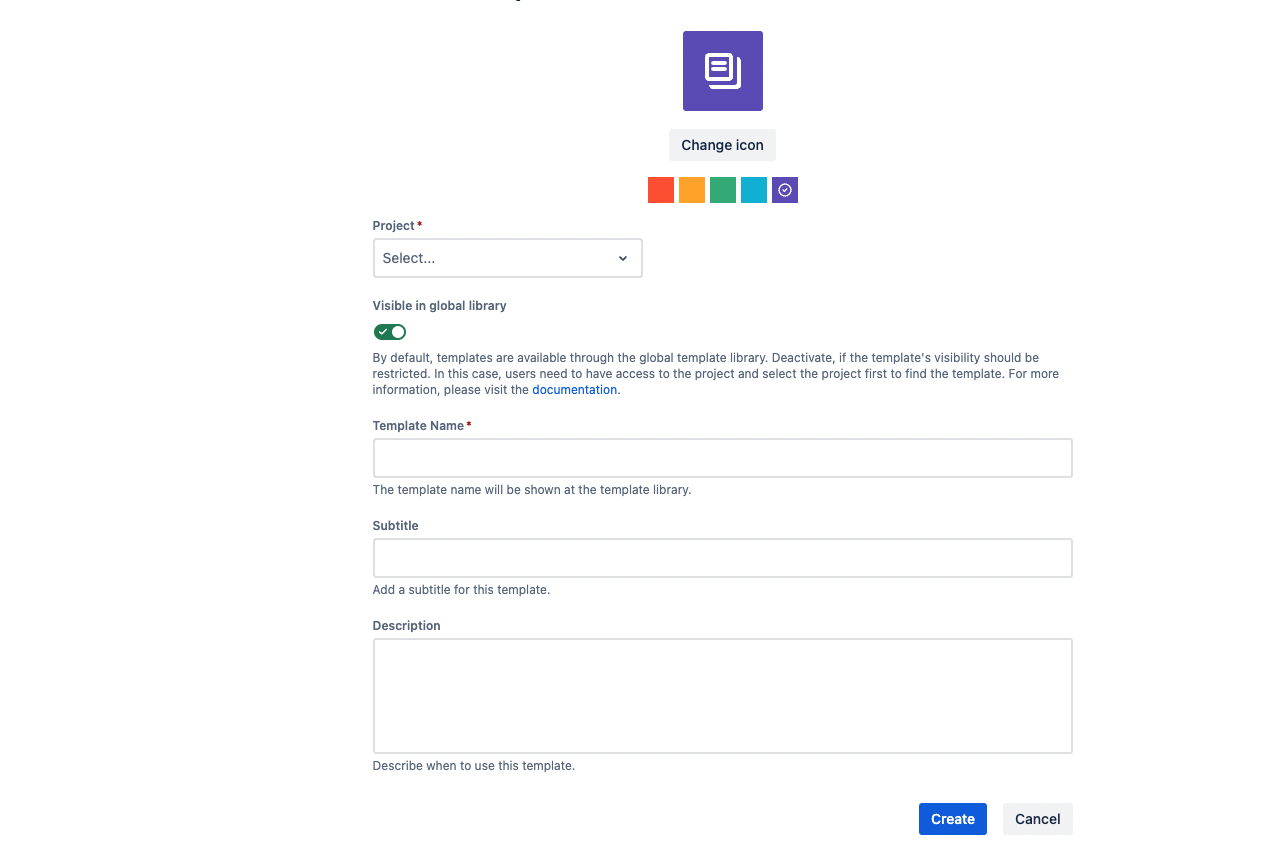
To create your own template, just select the “Create template” button pictured above. Choose the project where you would like to create your issues and decide if you would like the template to be globally available or not. Finally you can enter some meta information about your template including a required Template Name and optional Subtitle and Description.
Once you have created your template meta information, you can start adding issues. Choose the structure you would like to have. In our example, we are creating a new feature for our app. Let’s start by creating an Epic for the logging in feature we are focusing on and child issues for our research, analysis, specifications, and testing.
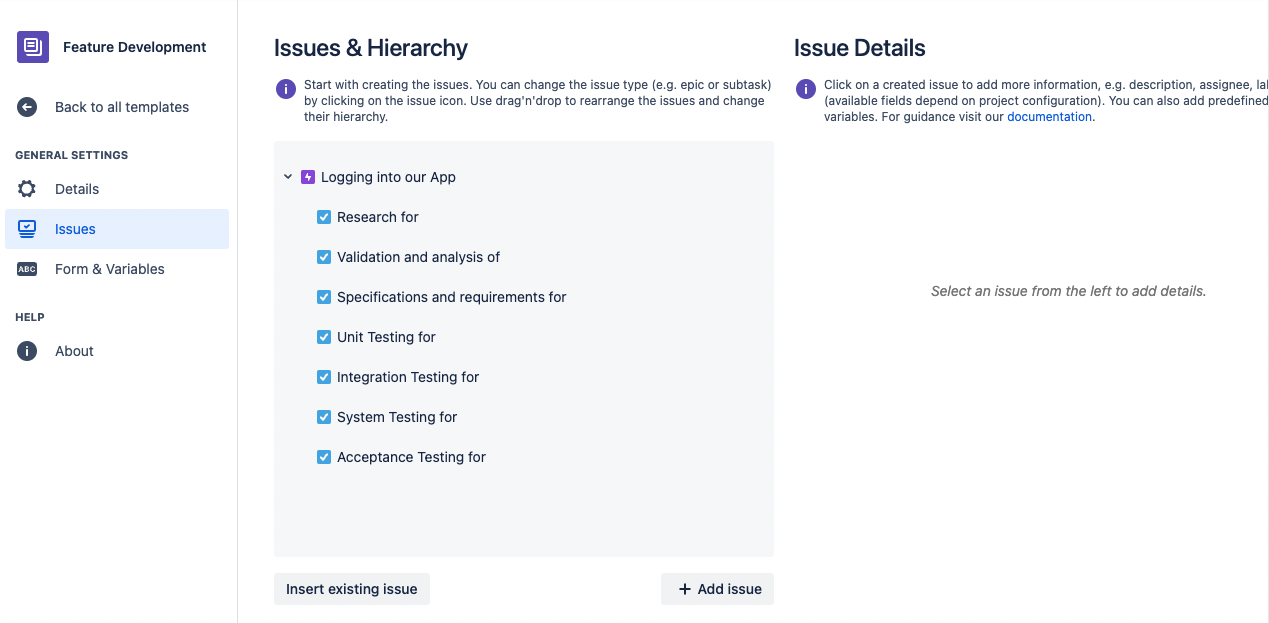
In the end, we could have something similar to the above image.
Now, if we want to use this template, anytime we do so the Templating.app tool will create all the issues above underneath our parent Epic. How cool!
While this is great, I’m sure there are more details you want to hash out in your issues. Let’s take a look at how we can further automate our issue creation process to save time.
Level up your templates
Within each issue that you create, you can also enter in some details depending on which fields are available in your project’s create screen. If you are used to assigning issues to users as you create them, you can do that with the assignee field.
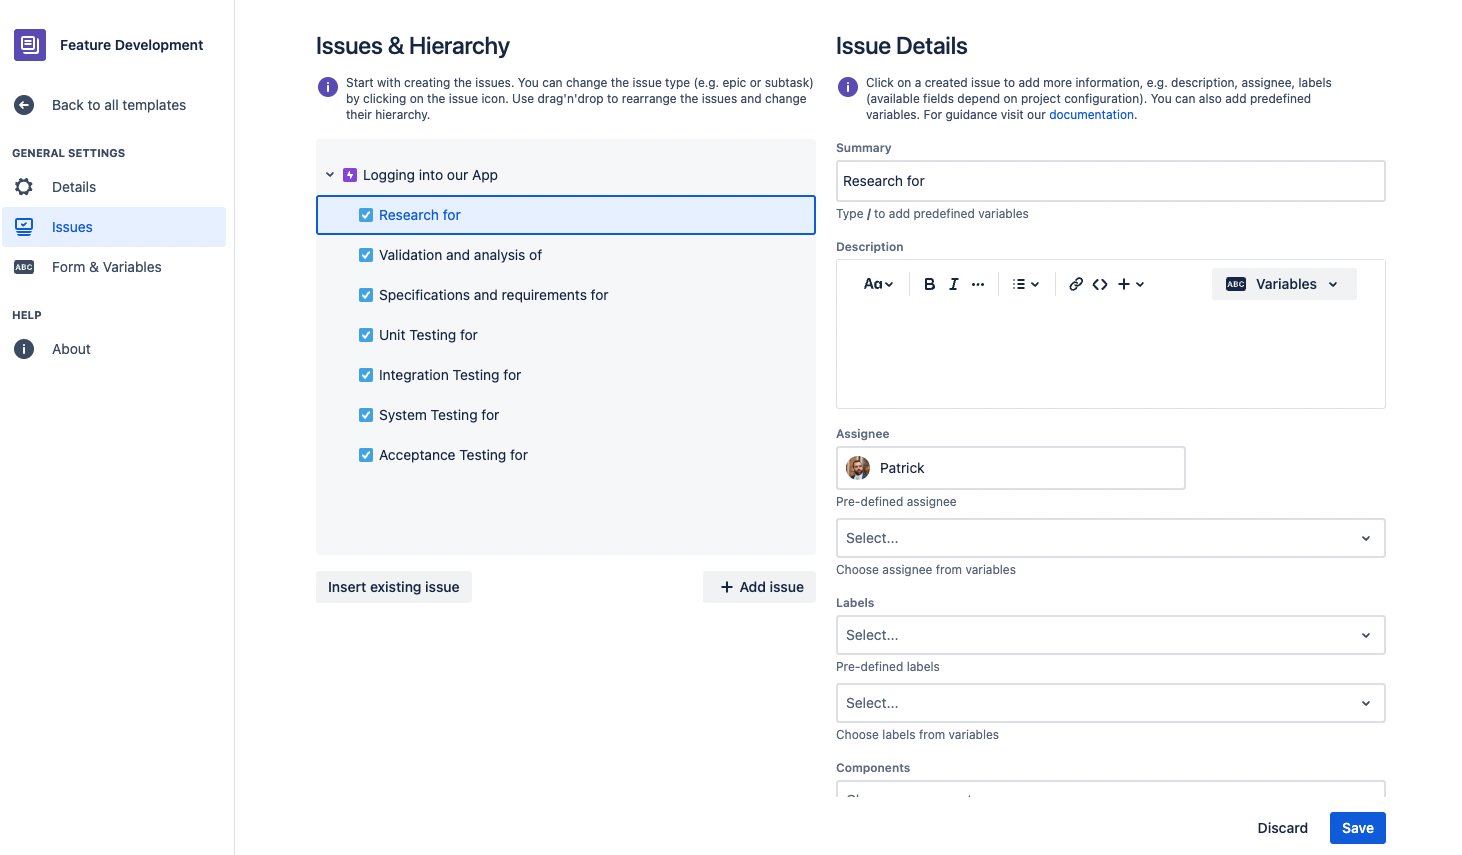
Other fields that we have available to set when we create the template are labels, components, priority, and fix versions.
Variables
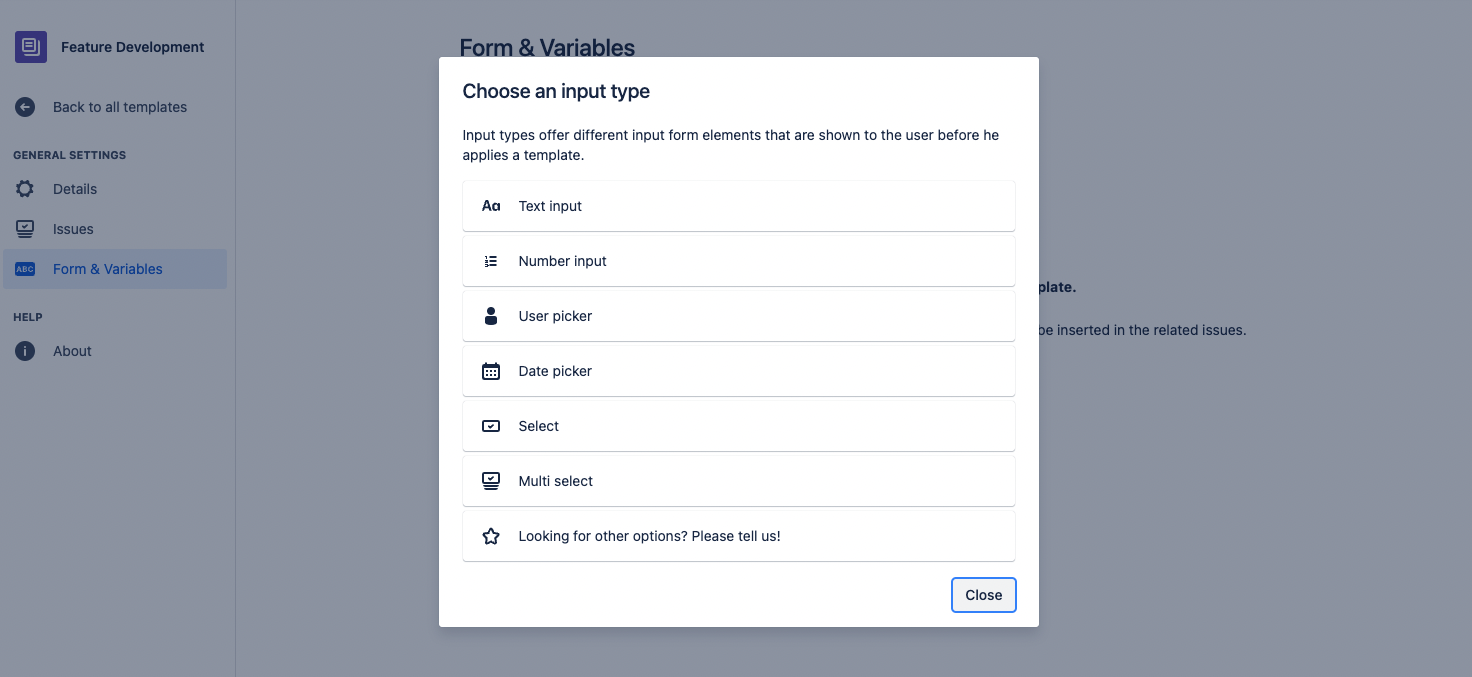
In the Form & Variable section of your issue template, you can create variables which the user will fill out in a form before they create issues using your issue template. The variable input types are pictured below.
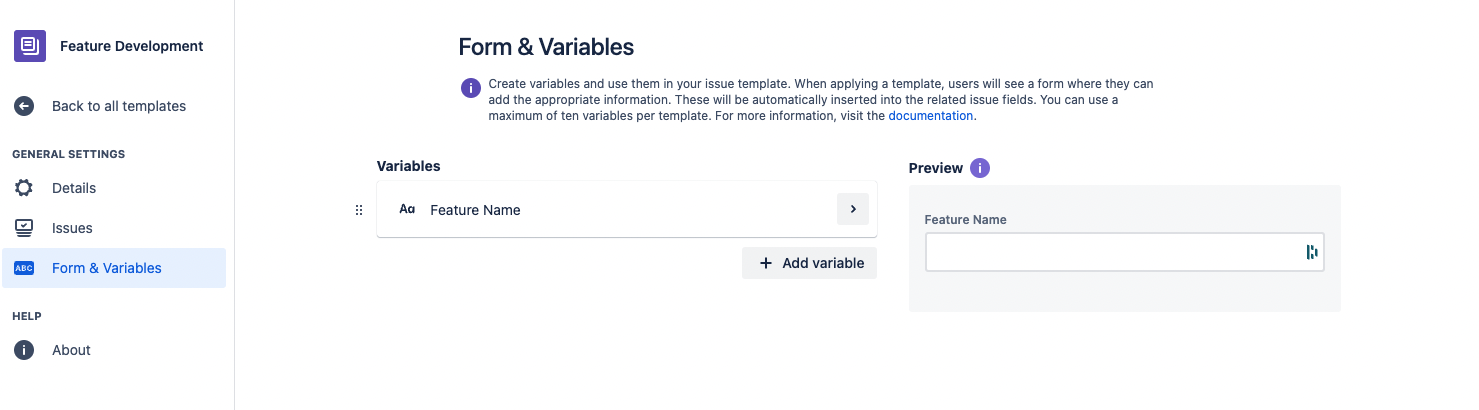
For our use case, we will start with a variable called “Feature Name”. This will be a Text input field.
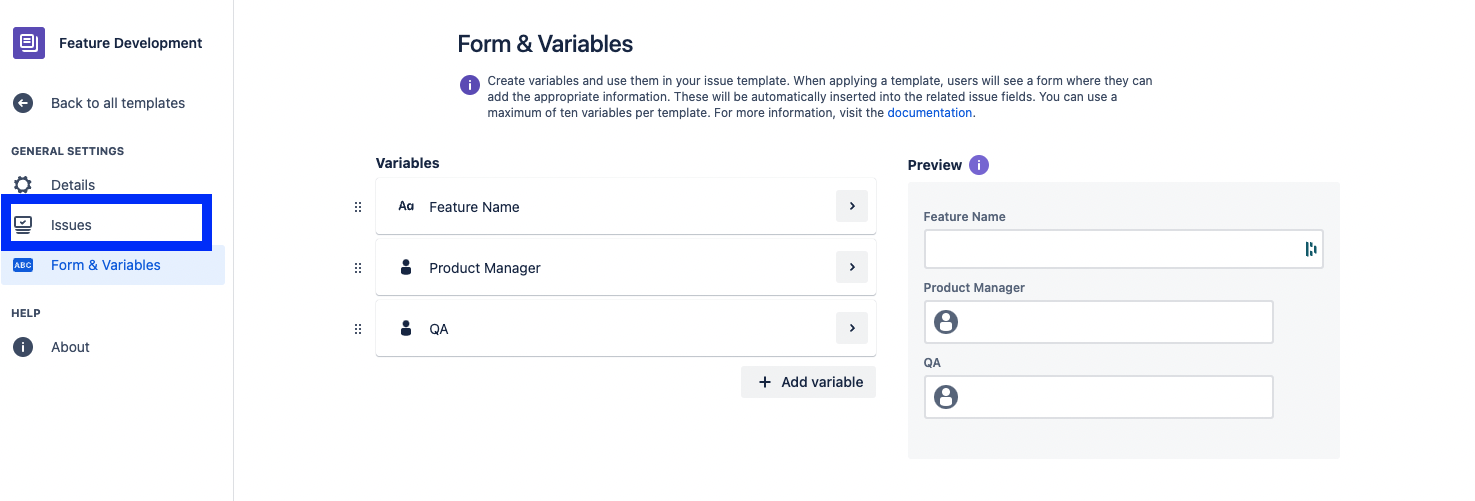
We will also add two other variables called Product Manager and QA. These are user picker variables.
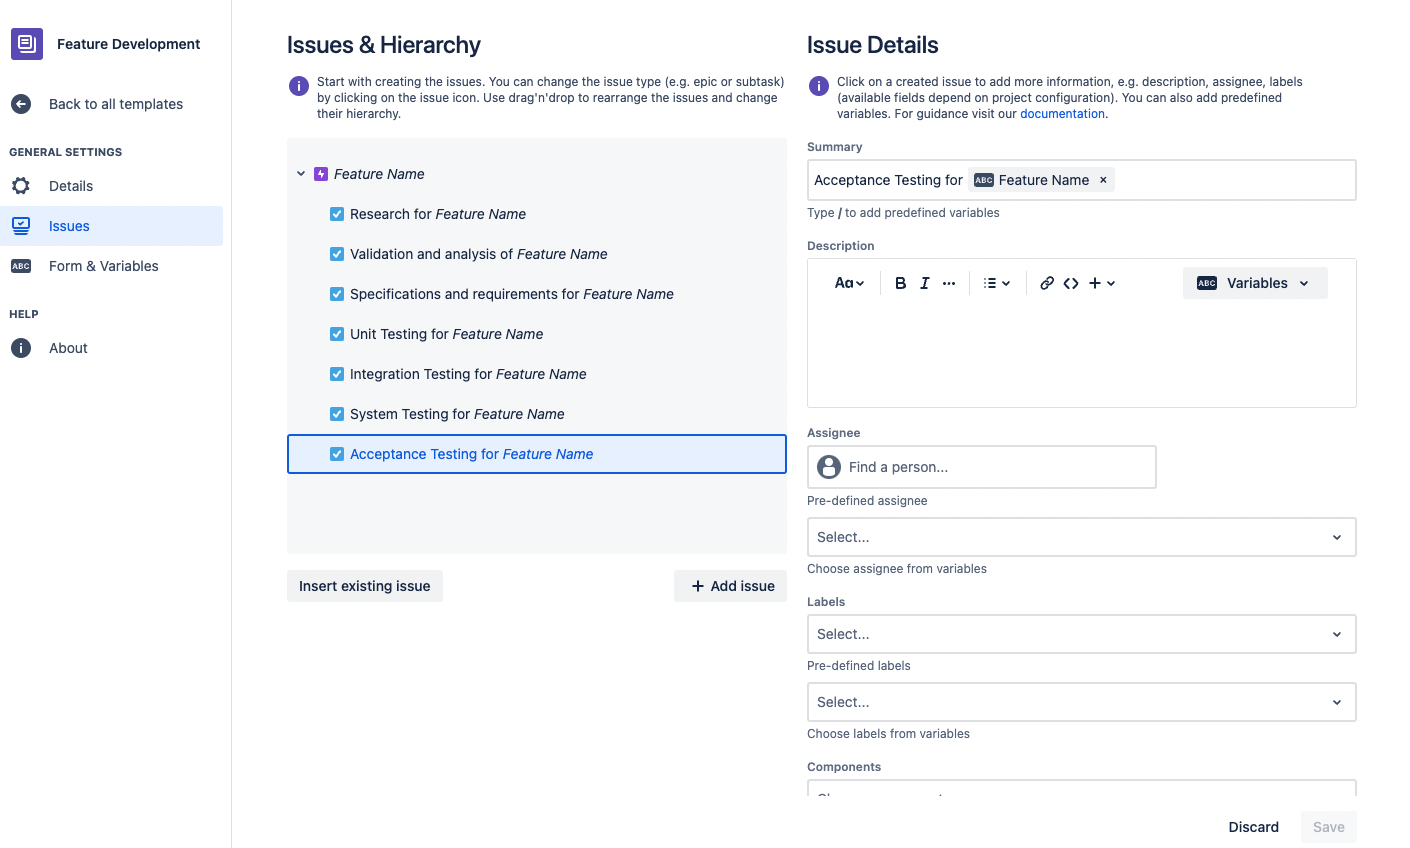
If you navigate back to the “Issues” section of the template, you can use the variables you created to populate fields in the issues your template creates.
If you noticed in the screenshots before, we had incomplete summaries for our issues, like “Research for”. Now, when we solicit the feature name in our template form, the Feature name will automatically populate in the issue summaries.
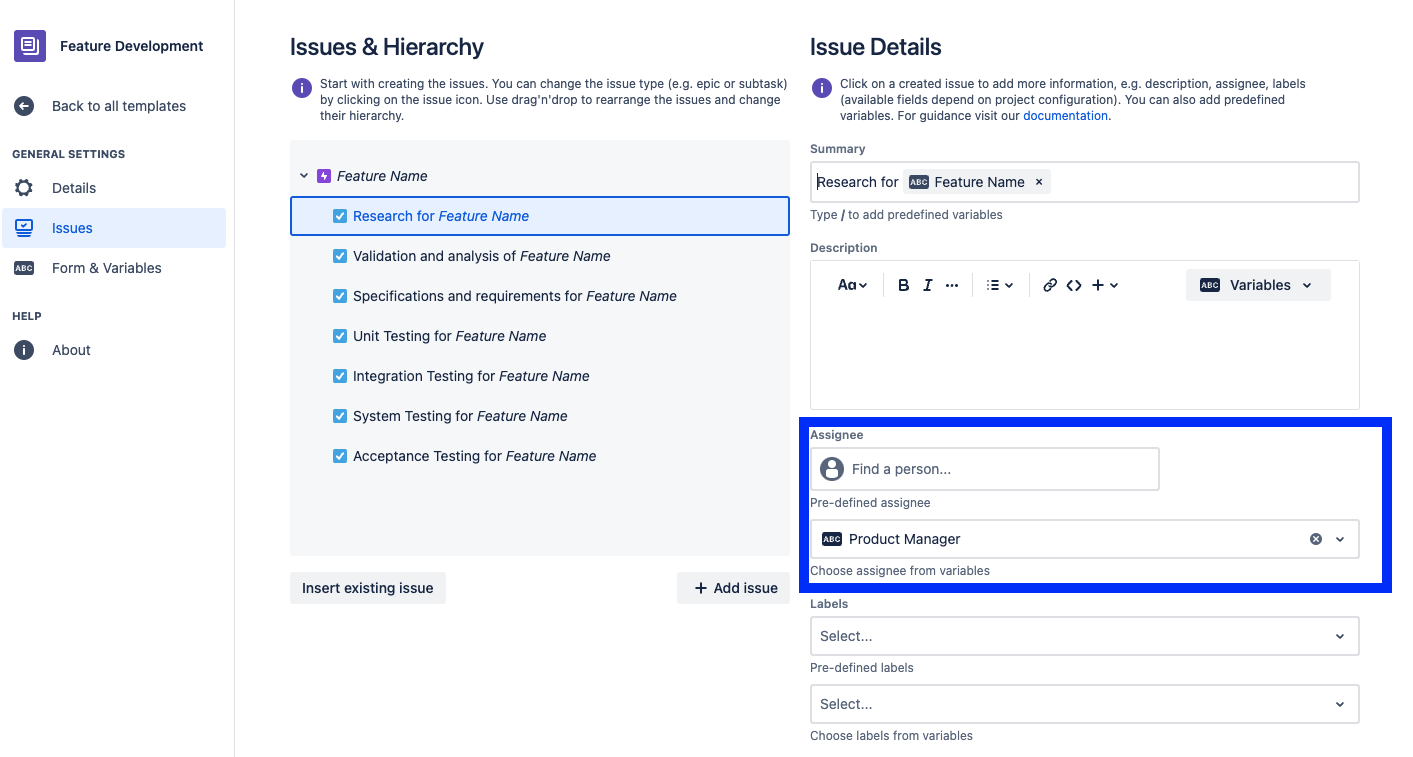
We can also use the Product Manager and QA fields to assign different users to our different tasks. For our research and validation tasks, we will assign them to the PM.
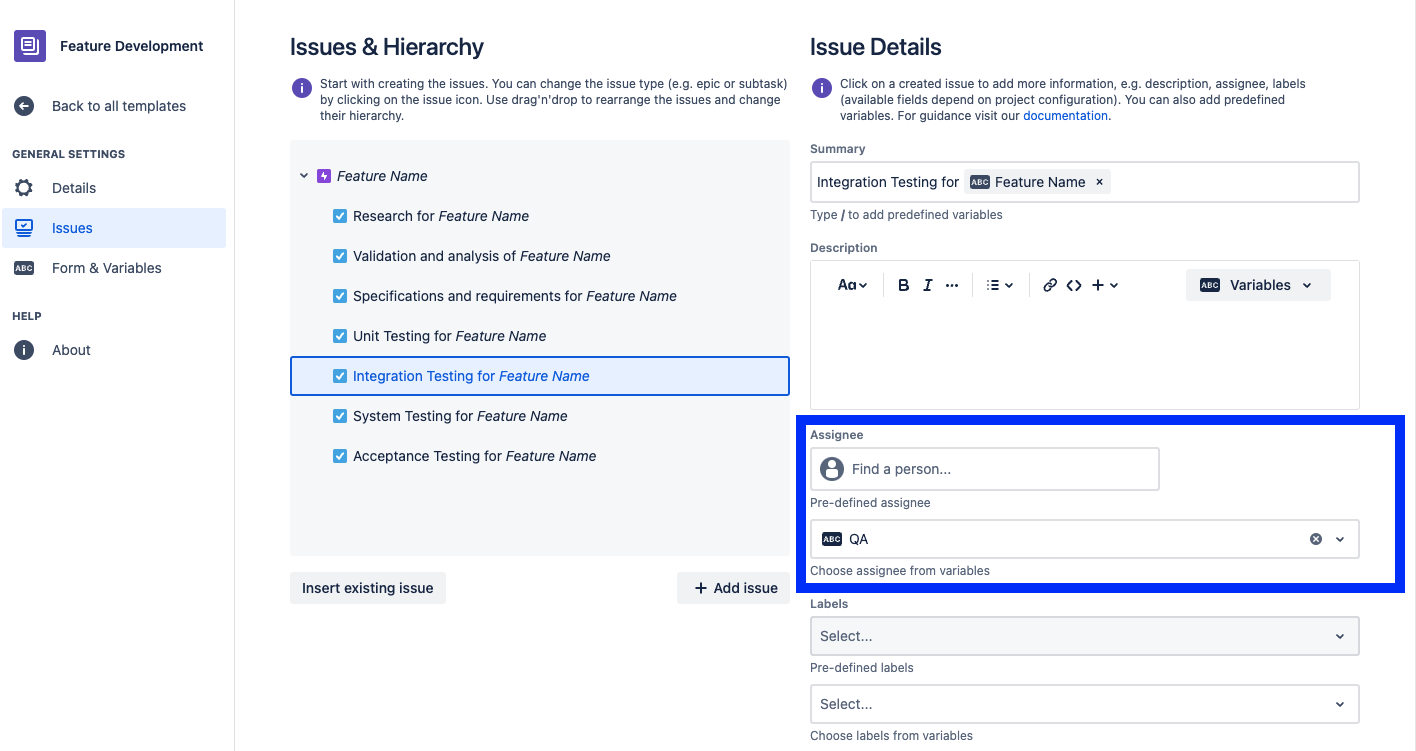
For our Testing tasks, we will assign them to our QA.
Automate to increase your agility
Teams these days are obsessed with agility. The faster your team can react to rapid changes in the market, the better suited they will be for long term success. With Templating.app and Jira, you can automate some of the most repetitive tasks in Jira which will free up your time to react to those changing market conditions.
If it takes you two minutes to create a Jira issue and your standard development work consists of ten or more issues, it’s probably worth automating if you are going to create new issues every week or even every month. The time you can save on creating an issue template will only increase as you continue to adapt your template to different use cases.
If you have found this post useful or interesting, please head to the Atlassian Marketplace and try Templating.app for free. Feel free to write us an email or book a free demo! If you need any additional help. Happy templating!
Further Reading
- Simplify your Offboarding Processes with Templating.app – Easy Issues & Subtasks
- Easily Turn Any Jira Issue into a Template in Jira Cloud
- Easily Create Subtasks for All of Your Jira Cloud Issues
- State of Developer: Autonomy is the future of software development
- Custom software development: Workflows, branches and continuous delivery


